Climbing Back onto the Java Horse
I took a short break from job-hunting1 earlier today to see if I could still write Java code. After my Java rehab which consisted of 3+ years of writing Ruby, I was a bit unsure how much Java I would remember. To get started, I decided to try and set up Eclipse on my MacBook Pro. I ran into a few problems which I thought I’d document here in case it helps anyone else.
Installing Eclipse
I downloaded the Mac OS X version of “Eclipse IDE for Java EE2 Developers” from the Eclipse Downloads page and unpacked it into my Applications directory. For the record, I was running OSX 10.5.6 and downloaded version 3.4.1 of Eclipse.
But when I double-clicked to start the application, I got the following error message:-
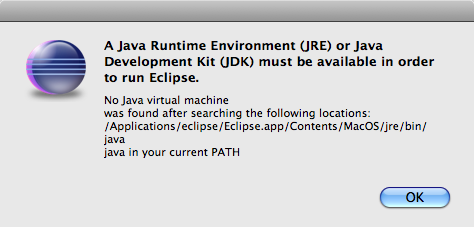
A Java Runtime Environment (JRE) or Java Development Kit (JDK) must be available in order to run Eclipse. No virtual machine was found after searching the following locations: etc, etc.
However, I was able to run the application from the command-line, which pointed to an environment problem. Reading the “Cannot find a VM” section of I unzipped Eclipse, but it won’t start. Why?, I decided I needed to explicitly specify the location of the JVM. It turned out there were a few gotchas. The OSX-specific bit of the installation README explains how to edit the eclipse.ini file within the Eclipse application bundle. Eclipsepedia explains the format of the -vm option :-
- The -vm option and its value (the path) must be on separate lines.
- The value must be the full absolute path to the Java executable, not just to the Java home directory.
So I added the following two lines to my eclipse.ini and the application started up successfully :-
-vm
/System/Library/Frameworks/JavaVM.framework/Versions/1.5.0
Note: I think that the -vm option must come before the -vmargs option.
JUnit4 and jMock2
Next I decided to see if I could write a test using JUnit and jMock to drive out the design of a simple class. I downloaded the most recent stable version of jMock which was v2.5.1 and added the relevant jars to Eclipse so that they could be included in my project classpath :-
- jmock-2.5.1.jar
- hamcrest-core-1.1.jar
- hamcrest-library-1.1.jar
- jmock-junit4-2.5.1.jar
At this point everything was going quite smoothly – especially after I side-stepped some of Java’s purgatorial nonsense by re-learning the Eclipse keyboard shortcuts for “Quick Fix” and “Content Assist”. But now I decided I wanted to try using JUnit Java annotations for my tests :-
import org.junit.Test; import org.junit.runner.RunWith;import org.jmock.Mockery; import org.jmock.Expectations; import org.jmock.integration.junit4.JUnit4Mockery; import org.jmock.integration.junit4.JMock;@RunWith(JMock.class) public class PublisherTest {Mockery context = new JUnit4Mockery();@Test public void oneSubscriberReceivesAMessage() { ...
Unfortunately I got this error around the @RunWith(JMock.class) annotation :-
The type org.junit.internal.runners.JUnit4ClassRunner cannot be resolved. It is indirectly referenced from required .class files.
After bit of Googling, I worked out that I needed a newer version of JUnit than the one (v4.3.1) that came with Eclipse. So I downloaded JUnit v4.5 and swapped it into the classpath. Problem solved.
1 I was made redundant from Reevoo at the end of last year.
2 Because I love all that enterprise goodness ;-)